Hello all,
The project I'd like to share with you today is very quick and easy to make and uses stamps from two of the sugar and spice stamp sets - 'In a word' and 'Love and Laughter.
I have to admit I am more than a bit partial to the odd glass of vino as are many other folk I know ;-) and I think giving a bottle of nice wine is often a great way to say thank you to someone. As with all gifts, it's lovely to receive something that's nicely presented so I thought I'd try my hand at making a wine tag that could be personalised depending on the recipient. And here is my finished tag:
I started by cutting patterned paper measuring 6" long and 3" wide. I used a basic grey 6 x 6 paper pad as the paper needs to be of cardstock weight.
I scored the paper horizontally 2" from the top then used a 1 and a quarter circle punch to make my hole for the bottle.
The next step was to use a border punch to make the tag edges which I attached to the tag sides.
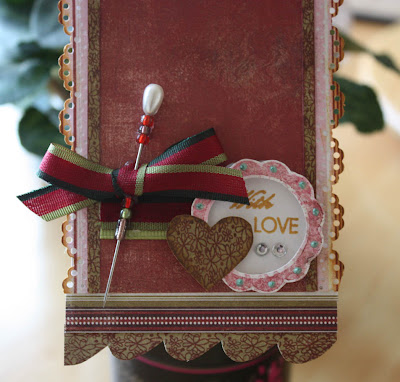
I attached two pieces of ribbon and made a small bow and stuck these onto the tag horizontally.
I stamped the flower heart once as a whole image and in a row along the edge of a piece of co-ordinating cardstock and then cut very small strips to place next to tag edges and cut around the hearts to make the scalloped border at the bottom.
I stamped the circular frame and the with love words from the In a word set to make the circular embellishment.
To finish I added a pin, a few beads and gems and attached my tag to the bottle.
Here are a couple of close ups:
Thanks for looking,
Nic


is is great Nic, I may even have to start drinking to get one !!! I love the use of the heart stamp for the edge. very inventive :)
ReplyDelete